Ouch! You’ve Just Hit a Creative Block…
You find yourself sketching away at characters, and it hits you. The creative block strikes again and your drawings aren’t coming out the way you’d hoped.
How do you overcome this problem? How do you make your character sketches exciting again and subdue that nasty beast, the creative block?
Well, today I’m sharing the answer to that very problem. Here are not one, but five character sketching tips to make your characters more exciting. So let’s hop to it, friend.
Watch this video now!
Avoid Adding Constructive Lines Too Quickly
The use of gestural shapes and lines up front will lead to a livelier and more exciting drawing.
Construction can act as a corrective, restrictive measure that can stiffen your characters up too quickly.
If you’re not careful, it can be like a dam that blocks the creative waters from flowing. It also takes you away too quickly from the exploratory phase.
It’s so vital to try different options even if the first thing you tried is what you end up going for. Starting to add rigid structures to a drawing too early is like moving immediately to the shading on the upper lip before you’ve even given yourself a chance to iterate.

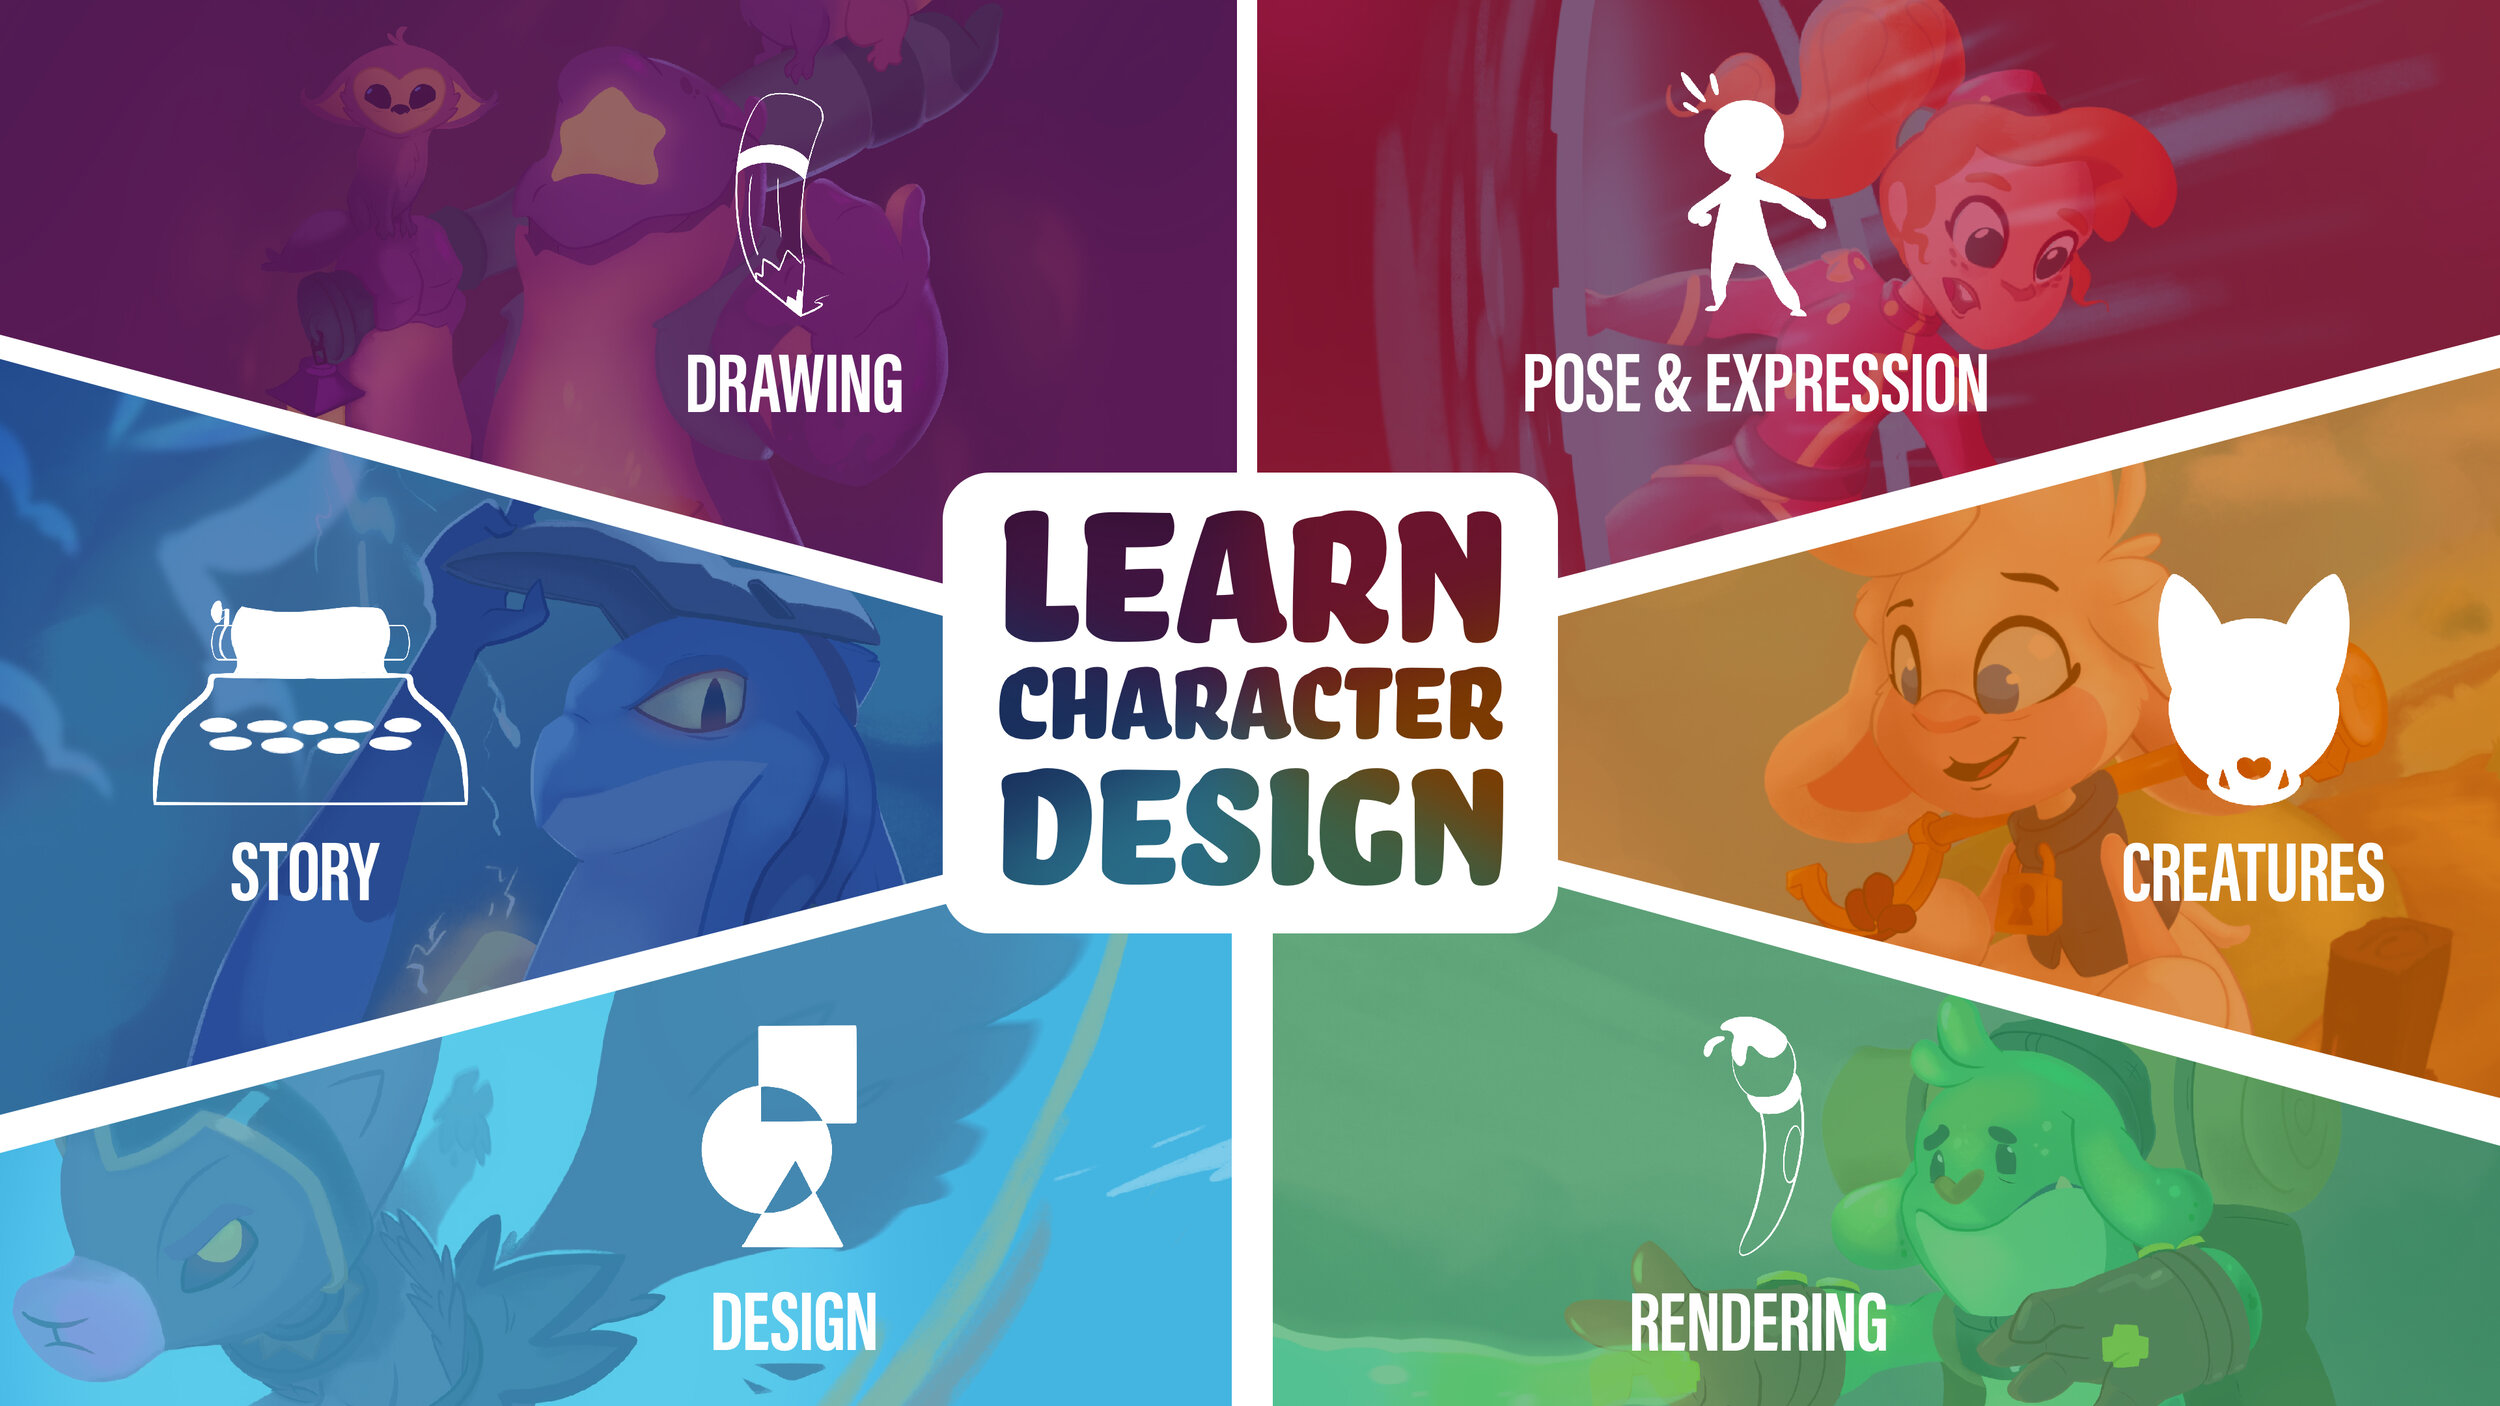
(Looking to get a better grasp on drawing and sketching fundamentals? Get a basic and advanced education on drawing technique with help from Module 1: Drawing, from the Learn Character Design Course.)
However, once you have some really interesting shapes, and a good vague idea, then is a great time to come in and refine your sketch with constructed shapes, to make sure it makes sense.
The great thing about digital sketching is that this can all be done in another layer, and can be completely non-destructive to your main drawing, you can simply use it as a guide to inform.
(Make sure your lines aren’t hurting your overall sketch by checking out my video “Are Your Drawings Being Betrayed By Your Lines?”)
2. Practice Subject Matter Tracing
Pull up some reference images that are relevant to your subject matter and trace these images as an opportunity to learn something about them.
Trace, not because you’re going to use something traced in your image, but because you want to study something a bit more advanced and digest it mentally.


Artists will do this to understand another artist’s style, to understand human or creature anatomy, or to measure out proportions. Remember that the purpose for this is educating yourself and not plagiarizing, and you’ll stay ethically in the clear.
Sidenote here: while it’s great practice to gather reference for something, if you’re just doing blue-sky sketching without a specific purpose in mind, it is possible to have too many pieces of reference in front of you.
More than 3 or so images might be enough to overwhelm you. Your mileage may vary, but if this rings true for you try it out.
(Looking for pointers on drawing or sketching live subject matter? Check out this video: How to Draw 10X Better with Reference Drawing)
3. Create a Strong Silhouette
So you’re probably familiar with the idea of a strong silhouette, that having a clear, readable, exciting overall shape helps the character itself.
Well in checking the silhouette, you can try this process. Digitally, this can be non-destructive.
On another layer, fill your character in with a solid color so that the whole sketch is solid.


From here, you can make adjustments, cut shapes away to look better, etc.
Then you can come back over the new shapes and use a WHITE brush to add interior details. This is just a cool way to make new ideas, and maybe pull you out of that comfort zone of using lines only.
It’s even fun to do this from the start, the white lines end up being a really high contrast to the silhouettes and so you kind of end up getting the best of both worlds.
4. Love Your Sketch for What it is
When is your sketch actually done?
Well unless you have clear plans to do something specific with your sketch, like turning it into a digital painting or trying to specifically create inked comic art with it, there’s a good chance that you don’t need to abandon or hide what you’ve already made.
Not only can inking or redrawing overtop of an original image be incredibly time-consuming, but it can also sterilize or wash away the personality and texture—really the life— of your original image.

Maybe you feel the need to do this because you’re self-conscious about either how messy or unfinished your sketch looks. So instead, clean the sketch up a bit, add some color or brief rendering if you’d like, and then allow the sketch to exist organically the way that it is.
Chances are your audience will actually appreciate a cleaned sketch with all of the life still in it, more than a finished, over-polished piece you spent hours longer on.
5. Fix the Sketch in the Moment
Often, the very reason that we begin rendering and fixing is because there’s something about the sketch we aren’t happy with. Instead of fixing it in the moment, we hope the next step will help— uuuuuntil we’re at the end and it’s basically too late.

The amount of time it will take to re-draw the same thing we just drew a little bit differently while still in the sketching phase will be so much LESS than the time spent inking, rendering, and simply hoping for the best.
It’s better to learn something and fail faster, to recognize the places you went wrong, and then do better next time.
This is the great thing about being an artist. The greatest artist that ever lived is so much different from the greatest fighter pilot that ever lived.
The fighter pilot is just the person with the longest streak before something went dreadfully wrong. With art, you can fail over and over again, and use that failure to grow stronger. Isn’t that a beautiful thing? (It’s also a huge load off to know our life doesn’t depend on one bad brush stroke!)
(Looking to perfect your rendering technique? Check out Module 6: Rendering in the Learn Character Design Course)
HEY WHAT’S THIS? A BONUS TIP?
6. Use Different Brushes You’re Not Familiar With
Take some time to try drawing with a different sized brush than you currently are.

For me, that might mean that I start with a thick brush for shapes, and then go much thinner for details.
Sometimes, I get so stuck in with a certain medium sized brush or pencil, that it feels like there’s bandwidth or resolution that I’m missing out on.
Maybe that rings true for you. That’s when it’s been really helpful to size down. Any kind of brush change or tool change can help you break out of a rut, but this specifically has helped me when I’m struggling.
It’s easy to get precious about the sketch that you’re working on and you might be hesitant to experiment on something that you drew really well and don’t want to erase.
Digitally, you can simply duplicate a layer and work with save states. That way you can always go back to an old version and you don’t lose your sketch. This can help a ton with being over-precious with a sketch or concept.
And that’s it! In just five —ahem, six— simple steps you have some better sketches in the short term and some better art in the long term.
We talk about good character design overall in my course Learn Character Design. And make sure you’re following over on Instagram @bageldenizen, we’ve been sharing a lot there recently.
Now, I want to hear from you. What sort of character are you sketching right now? Let me know in the comments section below! Thanks for reading, and have fun creating!
Do you Want to Master your Digital Art and Character Design Skills?
You Can Do it in Just Six Steps
Take the online course now that has helped countless students master basic and advanced character design skills.

Hey! I’m Brookes Eggleston…
If you’re new here, welcome! I’ve worked in studio settings and in a freelance capacity as a Character Designer, Illustrator, Story Artist, and 3D Modeler for nearly 15 years. But what I love as much as drawing characters is sharing what I’ve learned. Get to know my mission here at Character Design Forge.